I do like the original wheel!
The wheel is one of the things that you touch when driving and get feedback of quality etc.
Unfortunately with contact they wear and new ones are not available.
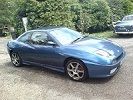
The one which was in my car at purchase was badly worn, as was the interior.
Finding a decent second hand one is possible but will still not be perfect. I did find one which was in decent condition which I have been using.
The donor wheel in the pictures was one I bought very cheaply and had been covered in alcantara.
It lasted about twelve months before it looked a bit too shabby.
While browsing I came across for sale a new Fiat 500 sport wheel.
I liked the design of it. It was Fiat so may fit. Price wasnt too bad (without air bag) for a new wheel.
Thought it will be possible to resolve the space where the air bag sat.
Searching more, I found a few second hand ones.
I either got no reply or dunno, fits a 500 when I was enquiring with regards to the bore and spline size.
In the end I found this one which was half the price of the new one and looked decent enough in the photos but was still a gamble on condition.
I was very happy when it arrived as it was in perfect condition. No sign of use anywhere.
Getting it to fit.
The bore and spline are the same as the Coupes. The 500s does have three locating splines which I would guess are used to index the wheel central.
This could have been easily resolved but, the stub is just too short.
Hence, chopping the plate and shaft from the donor wheel and attaching it to the new one.
The new one is cast aluminium and the original is steel and welded.
The weight difference is very noticeable between the two.
The Coupes being of steel and polyurethane dense foam rubber is a real heavy weight to the 500s light metal and plastic shroud.
Not being able to weld the two different metals I drilled and tapped ten m6 holes in the 500 wheel plate to attach the Coupes steel plate.
For good measure, I did put locknuts on the bolts and used a polyurethane adhesive between the two surfaces.
Transferred through the clockspring fixing holes etc.
I also had a 25mm gap to fill between the back of the wheel and the column cowling. Which was resolved by producing the oval ring out of abs in the pics.
The diameter of both wheels are the same and it sits in the same position back and forth.
Filling the gap.
I was not sure about keeping the buttons either side.
Whether to remove them and make it part of the new fascia or keep them as they were already there and looked ok.
The other thing to resolve would be the horn.
So I plastidipped the faces and adapted them to control the horn.
Otherwise I would have ended up with some not very pretty aftermarket knob/button affair.
To my mind, it justified keeping the multifunction buttons as they did have a use.
Albeit it could be argued that eight horn buttons is overkill.
I sculpted the fascia several different times until I arrived with what you see.
I used Newplast which is kind of a plastercine for grown-ups.

There are better versions of this type of material I would normally use but had this to hand and it does the job.
Silicone mould then taken with a fibreglass jacket.
I was going to cast this in fibreglass but used polyurethane resin.
This was then worked on to smooth and refine any of the imperfections from the sculpt.
I had decided that I would just use plastidip as the finish. Spraying it satin black first. I was not totally convinced and that it would look unfinished.
Ended up trimming it in a nappa leather. Which I think looks a lot better.
Although I may re-trim it as I am not 100% happy.
I was going to dye the red stitching black, on the steering wheel as I have a black on black interior.
Instead, I have replaced the two gators and handbrake handle cover with red stitched ones.
The gear knob with a new red stitched Punto Evo Racing one.
Which brings me back to the beginning.
New feel wheel and gear knob makes it a nicer place to be.
@Mark 147GTA seats


![[Linked Image]](http://www.fiatcoupeclub.org/fiatcoupenet/pics/sig_book_v1.gif)


![[Linked Image]](http://i117.photobucket.com/albums/o74/coupedummy/coupedummy.jpg)